london | day one

Saturday, July 27, 2013


I’m in London! I don’t think I’ve wrapped my head around that yet…
Some pretty typical sights: Houses of Parliament

I survived my ten-hour flight from Richmond to Heathrow, much thanks to my Aunt Suzanne and grandmother Rhonda. I had jet-lag pills, blankets, pillows, eye shades, everything I could ever want for a comfortable flight: and I did get some sleep, which is quite an accomplishment because I have never been able to sleep on planes. My first sight of Europe was the western coast of Ireland. I could see the seaward cliffs from the airplane, and the land looked so rich and green, patched with the huge shadows of clouds up above. The island was bigger than I thought, too. As we drew closer to London and I looked down, I had that instinctual tug that something was amiss – and of course, the highways are opposite what I’m used to! I was excited about this stupid little detail, smiling to myself on the plane. But I feel like I’ve learned so much about this culture, reading endless amounts of British literature and watching James Herriot, Miss Marple, Sherlock, etc. It's a huge deal for me to finally see these things for the first time! 

Big Ben
Like I said, it’s hard to wrap my mind around London. Most of the time that I’ve been here (so far!), it just seems like any other city I've visited, Chicago or New York or Washington DC, perhaps more beautiful and green. But then little things make me smile to myself. My check for lunch was in pounds sterling! That monument is 3500 years old! This is where Sherlock Homes and James Bond had their adventures (not fictional to me)!

Anyway, when I arrived at the airport (and was delighted by the ‘way out’ signs), used the toilet, and went through the customs line, the first uniquely British thing that struck me was that it was much more quiet. In the restroom, none of the girls were carrying on conversations between stalls, shouting at children, talking on their phones, not even ‘excuse me’ or ‘thank you.’ Silence. And it was wonderful! The hallways and customs lines were also noticeably more silent than in American airports or public places: there was only hushed conversation within parties. It was different and very nice!

the London Eye
I took the Underground to my dorm, which is on High Holborn, several blocks from both the Holborn Station and the LSE campus. I successfully used my chip-and-signature card in Europe without any problems. And when I stepped down into the tunnel to catch the train, as soon as I heard the clattering of the rails and the whoosh of cool air coming down the passageway, I couldn’t help but think of the Chronicles of Narnia, when the Pevensie children are swept into Narnia by a passing Underground train. I’m such an nerd. I was also delighted 'please carry dogs' sign when I was getting on the train.

I found my way to my residence hall (without the help of internet or maps, thank you very much!) and found that I wouldn’t be able to check in for four more hours. Immediately next to the hall is a little French café, so I went down for lunch: delicious watermelon and cucumber juice with chilled gazpacho. Not very British, but it was actually pretty hot outside. Then, following the recommendation of my Grandpa and Rhonda, I boarded a hop-on, hop-off tour coach around the city. It was quite an exhaustive trip! After three hours, I had seen all the major tourist destinations and much more besides. Again, it was difficult to believe that I was really here, in the UK, in London. Hopefully tomorrow, after I’ve caught up on my sleep, I can go back and visit some of the more prominent tourist stops before my class starts.

St. Paul's Cathedral
The other students are still arriving tonight and tomorrow, and I (officially) register for my class at LSE tomorrow afternoon. I may take the rest of the evening to nap… 

recipe: doggie fresh-breath treats

Wednesday, July 17, 2013

Let's admit it, pups can be a little stinky sometimes. But don't we all want to enjoy those wonderful slobbery kisses? These tasty peanut butter and parsley treats, based off Pickles & Honey's recipe, will let your puppy munch away bad breath!

Because I wanted to use a cookie cutter (rather than just spooning out the batter), and because one of my dogs can't have gluten or dairy, I altered a few of the ingredients from the original recipe. The amounts here will make 25 - 30 treats.

Ingredients:

2 cups almond flour (or any other kind of gluten-free flour if you want your treats to be gluten-free; you can always use white or whole wheat flour as well. If you want to be able to use a cookie cutter, have some extra flour on hand too)
1 tablespoon baking powder
1 cup all-natural peanut butter
1/2 cup diced apple (about one small apple)
1 cup nonsweetened almond milk (or any other kind of non-dairy milk. You can certainly use cow's milk as well, if you want)
1/2 cup fresh chopped parsley

Method:

Preheat oven to 375 F.

In a large mixing bowl, combine peanut butter, almond milk, and diced apple until creamy. Add in flour and baking soda. If you are going to just scoop out spoonfuls to make round treats, stick with 2 cups of flour. If you'd like to be able to roll the dough out and use a cookie cutter, add in extra flour, until the dough doesn't stick to your hands when touched. I used about an extra cup. Mix in chopped parsley.

Either scoop out spoonfuls onto a greased baking sheet (if you're making round treats), or sprinkle a flat surface with flour and roll the dough out until it's about 1/2 inch thick (if you're using a cookie cutter). Cut out shapes (Petsmart and Walmart have doggie-themed cookie cutters!) and place on a greased baking sheet.

Bake for 20 minutes, until golden-brown and a knife comes out clean when inserted into the centre of a treat. Remove the baking sheet, and allow the treats to cool on a wire rack.


Look at this little beggar! My puppies gobbled down the treats as soon as they were cool; they loved the peanut butter and apple flavours, and the parsley made their breath quite lovely. Nice and sweet and fresh!

Enjoy!


life tip #2: calling cards are timeless

Saturday, July 13, 2013


Calling cards are the new business cards, which is funny considering calling cards have actually been around a lot longer.  As more and more entrepreneurs and self-employed individuals take their careers and self-publicity into their own hands, it seems that the globalized, Internet-based world seems more friendly towards the calling card than the business card.  As a fresh college graduate riding endless waves of short-term internships and part-time jobs, it's not exactly time for me to be investing in business cards.  Business cards imply stability, an individual within a fixed career path - certainly not a bad thing, but for many of us young wanderlusting 20-somethings, it's just not the time.  Which is why I set my sights on getting myself some stylish, unique calling cards.  They're way more versatile, because they can be offered in situations ranging from a formal business introduction to meeting someone at a bar.  Plus, there's something timeless about having a hard copy of your contact info, should you ever have the opportunity to leave it behind on a silver platter...

I wanted something simple but classy, so I started searching around for affordable, smaller-quantity sets of calling cards.  I stumbled upon Washington-based Hoban Press, which does old-school letterpressing by hand with early 1900s printing presses!  They're classy as hell and their Etsy shop offered the option of pre-designed templates in sets of 100.  At less than $1 a card for such a labor-intensive type of printing, these were quite the deal!  They arrived today and I could not be happier with how they turned out.  The best part?  Hoban saves your plates and gives you a 20% discount on future reprints!  Business cards come and go, but calling cards can last you for life!

One last thing - check out this video of Hoban Press's machines!  I think this is so cool, but it might just be because I'm a publishing nerd.  I'm currently interning at Yale University Press, and as I'm working in their Production department I literally spend my days dealing with printers, inks, dies, paper, foil stamping, &c., so seeing how these processes used to be done on machines in the early 1900s - and finding a company that maintains and puts to good use those same machines - well, that's pretty spiffy. :)


preparing to study abroad in London

Monday, July 8, 2013

Jaime Olivares photography


I'm off for London in almost TWO WEEKS! Earlier this year, I was accepted for summer school at London School of Economics, and I still can't get my head around the idea. I'll be taking a finance class at LSE from July 29 to August 17, and though I already have my class, airfare, and accommodations in London all set up, there are some final preparations that I'm working through this week. I wanted to share them here so I could 1. start off my travel journal, and 2. share them with other American students who will be studying abroad in London! 
 
Here is my checklist:

Make sure your passport doesn't need to be renewed - or apply for a passport if you don't have one! Applying for or renewing a passport will cost you around $100, and will take about a month. So do this well ahead of time! 


Verify whether or not you will need a visa. If you are a student from the EU or EEA, you don't need a visa to study in the UK. But students from the US and other areas of the world do need some type of visa. Because my program is for less than six months and I'm from the US, I qualify for a Student Visitor visa. This means that I only need to show proof of my enrolment (like my acceptance letter), along with proof that I'll be in the UK for less than six months (my return ticket), I'm over eighteen, and I have enough funds to support myself while abroad (cash or a credit card). I'm also bringing proof of my accommodation and tuition payments just in case. I need to show these documents to the immigrations officer once I land in London, and voila! Student Visitor visa. However, students from other countries may need to apply for a visa, for which they will need a visa letter from the institution they'll be attending. More information about this can be found here.  

Also, if you're studying full-time in the UK for more than six months, you must apply for a Tier 4 Student visa once you've been accepted at your institution. More information about that can be found here. Whatever type of visa you'll need, it's best to start figuring this out several months in advance of your program date: applying for and receiving a visa can take weeks, if not months, and it's best to not put off.   


APACS
Get a credit card you can use in the UK. Unfortunately for American students trying to study in the UK, Europe is a step ahead of the US in credit card security. Many retailers in Europe are unwilling to accept the credit cards we use in the US because they're not very secure. Instead, European cards use chip-and-PIN or chip-and-signature technology, which are embedded with a computer chip and are supplemented with a personal PIN or signature to verify ownership of the card. Your traditional American swipe-and-sign credit cards won't work; the chip-and-PIN card needs to be inserted into a machine which will read the computer chip, and then you'll need to enter a PIN or sign. Additionally, many European retailers don't accept American Express cards. If you're going to be in the UK for any extended period of time, just be on the safe side and get a chip-and-PIN card. You can still use it in the US and it'll make life much easier when you're abroad. The problem is that they're difficult to find in the US. Only a few banks offer them. Eli got hers through Bank of America, and I am getting mine through Chase. It's also handy to find one that has no foreign transaction fees, since many cards will charge you an extra fee if you use it abroad.

Notify your bank. Whether you're planning on using your American credit/debit card, or are getting a chip-and-PIN card, notify your bank before leaving the country. It's fine to do this the week of, but even if you don't plan on using your debit card abroad (like I do), notify the bank just in case. You never know if you'll have to use it at an ATM or in a case of emergency. Most banks won't allow transactions abroad (or even in other US states!) if you haven't given them prior notice - they'll just put your account on hold. So do it just to be safe.

Notify your health insurance company, and purchase travel insurance if you think you'll need it. Similarly, notify your health insurance company before you leave. Hopefully there won't be any emergencies, but just in case, you don't want to find out that your health insurance doesn't apply if you're abroad. I called mine (Anthem) and asked if I could use my insurance abroad, and they said that I could use my insurance abroad in case of emergencies, and they had a list of physicians on their website that were covered in cases of non-emergency treatment. Easy! Don't assume that you'll be covered, though - make certain before you go. Many students also like to purchase travel insurance (often offered through your school or study abroad program) in case anything is lost or stolen abroad, or if you have to cancel with short notice and wouldn't otherwise receive a refund.  

Stock up on any medication you take regularly. Because you can't be sure that your medication will be available abroad (or what price it'll be!), stock up on any medication you need before you go. I'm even bringing my own non-vital meds, like ibuprofen and Nyquil. It's better to know you have it rather than having to hunt through an unfamiliar pharmacy in a different country to find the right medication while you're sick. If your insurance covers your medication, you'll need to get their permission to get more than the normal dosage from your pharmacy before you go.

Get any vaccinations required for travel abroad.  As a US student traveling to the UK, I don't need any vaccinations, but if you're traveling elsewhere in the world, it's likely that you'll need to get a few vaccinations beforehand, or at least bring proof that you have the basics already. Make sure to check several months in advance so that you have time to get whatever's necessary.   

servewlove.wordpress.com
Figure out what you want to do with your phone. There are a number of options to consider when deciding how to use your mobile phone abroad. It seems to me like there are three viable options: use your existing phone with an additional package from your provider, use your existing phone with a new local SIM card, or get a local prepaid phone. If you're going abroad for a shorter period of time (like I am) and want to use your existing phone number, keep your contacts, etc., I recommend just contacting your service provider and asking about the packages they offer for using your phone abroad. Instead of paying huge international usage fees, you'll pay for a certain amount of service to be used abroad, and for your friends and family back home, it'll be no different. I don't plan on using my phone much; I'll rely on Skype and Facebook and the like to communicate with friends and family back in the US. However, I know I'll use my iPhone frequently for its apps and internet. Because I'll be in London (where wireless internet abounds at cafes and the like), I'm just going to turn my cellular data off (in Settings) and Wi-Fi on and use whatever Wi-Fi is available. I also downloaded Pocket Earth, which is a map app that operates offline.

If you're going to be abroad for an extended period of time, it might be wise to get a local SIM card or a prepaid phone while you're abroad. Getting a local SIM card and having it put in your phone will give you a local number (remember to give this number to all those back home!) and may make you lose your contacts, but you'll be using a local provider and be paying local fees. However, make sure to contact your usual provider and have them 'unlock' your phone so that it can be used with another provider. If you're not too attached to your mobile phone anyway, you might want to just buy a prepaid phone (usually less than $50) and load it up with minutes, texts, and data. You'll be able to use it locally and pay for more minutes as you need them.

Make copies of all important documents. Once you have your passport, flight information, course information, and accommodations all figured out, make photocopies of all these things, along with your driver's license, health insurance card, travel insurance information, credit cards, and anything else that you could possibly need in any emergency situation. Give a set of copies to your parents or significant other here in the US, and keep another set of copies for yourself in your baggage. In case of any emergency, or if anything is lost or stolen, it will make matters much easier if your emergency contact in the US and you have copies of your important documents. Also, back up your laptop and phone before you go.

Get comfortable. If you're studying abroad, you're going to be doing hours and hours of traveling, whether by plane or boat or train. Before you set off, invest in a few key pieces that will make your travels much more comfortable. Magellan's is a good source for many of these things. I have a pillow/blanket combo (where the blanket is stored in the pillow) for in-flight comfort, along with a pair of earplugs and eyeshades. I also have homeopathic No-Jet Lag pills to help with jet lag on the nine-hour flight. Make sure you wear clothing that is comfortable (but not just pyjamas, especially if you're flying to Europe!), is layered (so you can adjust to low/high temperatures during travel), but where jackets/belts/shoes are easy to take off for security. And if you're going to London, pack a mini umbrella!

Travelon Executive Wallet
Invest in a passport wallet. It's going to be easier to have all your important forms of identification (passport, ID, insurance, credit cards, cash) in one place when you're traveling between countries and locally. You don't want to end up needing your passport for identification, only to have left it back in your room; you don't want to have to switch between your regular wallet and a passport wallet. I just have one good passport wallet that I'll use while I'm in London. It's also helpful to have one with RFID-blocking technology. All passport wallets made in the last five years have an RFID chip, which can hold your personal information and a photo. However, these chips (and even your credit card) can be read with scanners from up to ten feet away, so many passport wallets now include RFID-blocking technology so that thieves can't get your personal information. Good investment to consider!

Do as much as possible here. It's better to know you have something for a fact while you're abroad rather than to have to search for it in an unfamiliar environment. You might not know for certain that day-to-day products you rely on (toiletries, medication, certain snacks) will be available where you're going. This might not be as big of a problem in London, but if you're traveling from the US to a less-Westernized area, like Africa or the Middle East, you definitely want to pack those day-to-day things that you don't know you'll be able to find abroad. Even things like hand sanitiser, wipes, or tissues might be needed in a hurry when you're abroad but you won't know where you can buy them. Just have them on you in the first place.  

Also, here is my short to-do list of things to do immediately when I arrive in London:

Get an Oyster card. I'm flying into Heathrow, which has a direct Tube line to my accommodation in Holborn. And though my room is only a few blocks from the London School of Economics campus, I know I'll be doing traveling throughout the city as well. If you plan on doing any significant amount of travel throughout London, invest in an Oyster card - it's a prepaid card (the size of your credit card) that you touch to a yellow pad before and after you ride on the Tube. You stock it up with a certain amount (£5-50) and can reload it whenever you need. Additionally, your rides will be discounted if you use this card (rather than buying a ticket for each ride). You can buy one of these cards online or at any ticket station once you're in London.
tfl.gov.uk

Exchange your currency. Though I plan on primarily using my chip-and-PIN card when I'm abroad, I feel like it's also helpful to always have a bit of cash on me, for emergencies or quick small purchases. It's possible to convert some of your cash here (call around at local banks and see who has some of the currency you need), but easy to do it once you're abroad. You can have it exchanged at the airport (usually for a higher fee) or at a bank once you arrive. I'm going to exchange a small amount here (because I feel like it's easier to land in a new country with some money already on me), and then exchange a larger amount when I'm in London to keep for emergencies.

Well, that's my list so far! I hope this is helpful to any students traveling abroad in the future. Please comment if you have any other advice for me, or further questions about anything here! 

recipe: homemade lavender soda!

Sunday, June 30, 2013


A couple of months ago at my favourite grocery store, I spotted a new product on the shelves: lavender soda. Despite the fact that it cost more than $5 for a pack of four sodas, I tried it out... and was wowed. Lavender soda is lightly sweet, very unique tasting, and absolutely perfect for summer. But the cost of this luxe soda kept me from drinking it regularly.

I bartend at a small, locally-owned restaurant in Virginia, and one my managers featured a Lavender Collins as a cocktail special this summer, with lavender syrup, gin, lime, and soda water. I was making some of the lavender syrup for this drink, and eureka! I subtracted the gin, and concocted my own homemade lavender soda. It was better than the one in the store. This has quickly become my (and my friends and family's) favourite summertime drink. It is crisp, very lightly sweet, and perfectly refreshing.

Here's my recipe for delicious homemade lavender soda!

Ingredients:
  • 20-30 stalks of fresh lavender (if you don't grow your own, grocery stores sell it in their produce section in small containers)
  • 1 cup of sugar (don't worry, it doesn't all go into one drink!!!)
  • 1 cup of water
  • Soda water (club soda)
  • Fresh lime

Method:
Rinse the fresh lavender and pat dry on a paper towel.

To make a lavender simple syrup, combine the sugar and water into a small pot and heat over the stove on high until the sugar dissolves. Stir, then remove from heat and allow to cool. While the simple syrup is cooling, add the stalks of lavender (the whole stalks are fine!) and put in the fridge to cool for at least several hours. The longer you leave the lavender in, the stronger its flavour will become.

When the lavender has steeped into the syrup and cooled, pour a tablespoon or two (depending on how sweet you want your soda) over ice in a glass. Squeeze a lime wedge into the glass, and fill the rest with soda water. Mix gently, and garnish with a lime.

Super easy! Keep the rest of the lavender syrup in the fridge and just keep mixing small amounts with soda water and lime whenever you want a fresh drink - or make a whole pitcher! It will last for a week or more if refrigerated. I promise, you'll quickly become addicted. Enjoy!!

tried and true: best sunless tanners and tanning strategies

Friday, June 28, 2013


There are countless self-tanners on the market, and dozens that you'll see when you walk into pretty much any store right now. It's that season - everyone's showing off their beach bodies! The sun has started to shine again, and clothes are coming off...

I strongly believe that a good, healthy tan is one of the best ways to improve your look for the summer (or any time!). A golden tan helps make your skin look more firm and healthy, and will increase muscle definition. Who doesn't want that bronzed, fresh-out-of-the sunshine look for the summer?

However, spending too much time directly in the sun can be harmful to your skin. And tanning beds are definitely not good! I have spent many years trying to perfect the art of tanning, indoors and out, and am passing on the things I've learned through much experimentation and studying.

OUTDOOR TANNING is an art that needs to be practised with care. At least, that's the way I look at it. But this doesn't mean that you have to put a ton of effort into getting a beautiful, even outdoor tan! The key to a strong, long-lasting sun tan is regularly building with protection. I recommend spending time in the sun every day, an hour or less, with a lower-level SPF sunscreen (I use 30 SPF) with broad spectrum protection. An all-natural sunscreen option to consider is coconut oil, though limit your exposure even further if you choose this. It also helps to exfoliate beforehand, so the skin you are trying to tan is new and won't slough off for a while.

Though it will be difficult to get colour while wearing sunscreen, when you earn your tan after careful daily exposure, it will be more healthy, deep, and will last far longer than the burn you get after spending a whole day outdoors without any protection. This strategy may sound counter-intuitive, because sunscreen is supposed to stop the sun from getting to your skin. However, the sunscreen will let enough sun through to tan your skin (without burning!) if you do this on a regular basis. If you expose your skin with no protection, it will burn, killing and removing the layers that you are trying to tan! It's damaging those cells and after your burn peels off, you'll have to start from scratch. Tanning with a moderate amount of sunscreen will protect your skin enough to build a truly deep, long-lasting tan.

It is also very important to moisturise after exposure! Keeping your skin moisturised and nourished (even when you aren't burnt) will lock in and preserve your tan, and you will avoid dry and brittle skin. Make sure to avoid mineral oil in your tanning and moisturising products: it will strip away the colour you've been building up. Australian Gold Moisture Lock is my favourite after-sun moisturiser: this tan extender is soothing and mineral oil-free.

INDOOR TANNING should always be done in a bathroom, not in a bed! The risks of tannings beds are too high to justify using them, and there are so many safer options. Sunless tanning lotions and sprays are safe and easy to apply: I highly recommend this option instead! I feel like I've tried almost every sunless tanning lotion and spray out there, and I'll describe my favourites here.

Cheaper: Australian Gold is my favourite cheap-ish tanning brand. Their products can usually be found in drugstores, and their Self Tanning Lotion sells for $8.99 online. Several of their sunscreens also include a light self-tanner, and I feel that their products offer a more natural colour than others at this price range. Several friends of mine (who prefer a spray-on option) use Tanwise Tanning Spray, which looks very natural and can be applied smoothly. You can get a light to medium-dark tan with this spray, depending on how often you use it, and it's $9.00 a can.

Middle Budget: I use Mary Kay Subtle Tanning Lotion every day in the winter, and it gives me just enough colour that I don't look like a vampire, but not enough to look fake. This is a great, natural-looking daily bronzer for light colour. It sells for $16.00 on Mary Kay's website, and $14.00 on Amazon.

Higher Budget: St. Tropez is frequently rated as the best luxury line of suncare products. They have a very extensive range of lotions, mousses, and sprays, from a Gradual Tan Lotion (with anti-ageing and firming options too!), Self Tan Bronzing Mousse, and Self Tan Dark Mousse.  Their mousse products are a great streak-free alternative to lotion. The gradual tan and self tan products allow for very natural, light-to-medium colour. In the summer I use the dark mousse, and the unique thing about this lotion is its olive tint. Many dark self tanners tend to just be a darker shade of gold or orange, which never looks good, but the St. Tropez dark range has an olive tone that will look much more natural. Since this shade is so dark, I usually blend it with a dab of my daily moisturiser to soften the colour. You will also definitely want to use gloves when you apply this one (unless you opt for the spray) - they have an Applicator Mitt on their website, but I usually just use latex gloves from the drugstore. However, this beautiful dark tan will cost you - the St. Tropez products run between $30-44 per bottle.

Protecting your skin over the summer should be a top priority. Whether you go about it by wearing a light, daily sunscreen or using an indoor tanning product, make sure you take care of your health first!! It is very possible to have beautiful, bronzed, and safe skin this summer. Happy tanning!

affordable and unique favours for a natural wedding

Sunday, June 23, 2013

My baby (well, no longer baby!) sister is getting married this summer, and there are suddenly thousands of opportunities for creative little crafts. My sister wants her wedding to be very natural, with a particular herb/lavender theme. So many wonderful possibilities! One of my tasks over the past month has been to come up with wedding favour ideas, and I found these five options from various sources. They are all DIY, but are very simple and will add a more personal and unique touch to the wedding. I love the fact that they can be used everyday, by anyone, but are still items that the recipient might not have already.

The best part: they're relatively cheap to make! Each favour can be made for around $2 a piece; for my sister's wedding (where the guest list is close to 250!), one of these options will cost less than $500 for the entire event.

The trickiest part of these favours is the packaging. Several require a glass bottle, which can be expensive, but buying small 2-oz. bottles from wholesale sellers online is actually quite affordable. I looked at SpecialtyBottle.com and SKS Bottle and Packaging, and both have options for small glass bottles under $0.70 a piece.

Favour ideas:

Herb-Infused Sea Salt from Martha Stewart Weddings: Use rosemary, lavender, or Herbs de Provence for this long-lasting and useful favour. All you need is kosher sea salt, dried herbs, and an airtight container - combine, warm over the stove for a few minutes, cool, and you're ready to go. I found bulk sea salt for less than $2.50/lb. at SaltWorks and natural herbs at Frontier Co-Op.

Lavender Honey from The Herb Gardener: Another simple recipe: just infuse the honey with dried lavender, heat, and cool. Honey can be expensive, but I found natural clover honey for less than $5/lb at Anna's Honey.

Herb-Infused Olive Oil from Martha Stewart Weddings: Like the other favours, this is a useful gift that will last some time and can be used by anyone. Add a few snips of some dried rosemary (or your favourite herb mixture) to olive oil, and you're done! This looks beautiful in the bottle too.

Homemade Tea Favours: Creating your own unique tea blend for your wedding (or a bridal shower!) is a wonderful option for a different and special gift. You can buy bulk, whole-leaf black, green, or white tea and dried herbs from grocery stores, or online sellers (Mountain Rose Herbs, Mighty Leaf, and Frontier Co-Op, to name a few). Try a lavender-infused Earl Grey tea, green tea with mint, or a rose white tea. Then bind up the mixture in loose-leaf disposable tea bags (you can find many bulk options on Ebay and Amazon) and tie with string and a cute label. Voila!

Mini Potted Plant Favours: This is such a precious and unique idea for a natural wedding. I'd recommend picking a type of cactus, since they're pretty much indestructible, even if the new owner doesn't have time to take care of a plant. You can get mini cactuses and plants from sellers like Cactus Limon or SanPedroCactus on Etsy for less than $1.50 a piece. Pot the little plant in either a tiny glass jar or terrarium, or come up with another unique method (wrapping the roots in a mini burlap sack and tying with twine, planting in a mini pot and wrapping with brown paper, etc.). Another great idea for this favour is to also use it as a place or escort card at the reception: label each plant with the guest's name and table number, and then they can take it home as a favour after the event!

fresh-picked strawberry and mint lemonade

Tuesday, June 18, 2013


Now that the weather is warm enough, the height of berry picking season has arrived! This morning, my three little sisters went strawberry picking at a little local farm. They came back with boxes of sweet strawberries, and now it's my turn to think of unique ways to use them (not that just biting into one isn't good enough!). We have new mint growing out on our porch, so I made a delicious, lightly sweet sweet strawberry lemonade, and added mint to create a perfectly refreshing summer drink!

If you find yourself with some irresistible strawberries this summer, try out my method for this lemonade!

To make a pitcher, you will need:

- About a cup of lemon juice (I squeezed my own at home, but you can also buy it premade in the store... at home, you'll need at least six lemons)
- Several handfulls of strawberries (preferably fresh-picked!)
- Two or three stalks of fresh mint
- Sweetener of some kind (I used liquid Stevia to make a healthier lemonade, but you can use any sweetener of your choice: agave nectar, honey, or a simple syrup made from mixing equal parts granulated sugar and hot water)


My method:

If you're opting for fresh juice, cut the lemons in half and then squeeze the juice a bowl. Strain to get the seeds out and pour into your pitcher. Fill the pitcher at least halfway with water, depending on how diluted you like your lemonade!

Rinse and take the tops off the strawberries. You have two options here: you can either blend them in a food processor or blender if you have one for a smoother lemonade, or mash them for a more chunky, fresh texture. Your choice! Either way, put a few mint leaves in with the strawberries when you puree or mash them, to release some of the oils in the mint and make sure you get some fresh mint flavour. Add the strawberry mixture to the pitcher to taste. The strawberries will add a lot of sweetness, so use as much as you want to get the desired strawberry/lemon balance.

Mix with a wooden spoon and sweeten to taste. I used about an teaspoon of Stevia and that was plenty for me. Whatever your method, adding a liquid sweetener will be easier to mix than just sugar, so try simple syrup or agave nectar instead!

Crush the rest of the mint leaves with your fingers and add to the lemonade. I like putting the whole leaves in because they'll continue to steep in the lemonade, and look beautiful when your pour the drink into a glass jar. You can leave them in or scoop them out after a day.

Mix again, and pour over ice. Sit outside in the sun and enjoy a relaxing summer afternoon!!

6 wow-your-friends desserts

Saturday, June 15, 2013

I’ve always been amazed by fancy desserts – in shop windows, at restaurants, wherever. Some of the creations that chocolatiers come up with just completely blow my mind. Zab and I are going to be in Paris in a couple months, and we can’t wait to visit famous pâtisseries like La pâtisserie des rêves and Hugo et Victor. The only downside is that all of these unbelievable creations seem impossible for the plebeian chef. But no longer! Below is a collection of impressive desserts which are actually relatively easy to create! Keep it a secret that you put very little effort into these, and you’re sure to wow your friends with this array of unique and mouth-watering treats!  Enjoy!

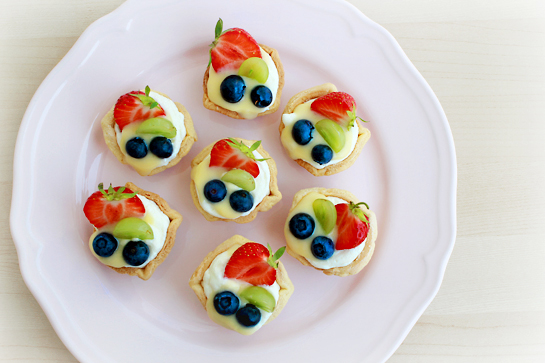
Chocolate-Champagne Truffles by Martha Stewart | Pinata Cake from A Subtle Revelry | ZoomYummy’s Summer Mini Fruit Tarts

Martha Stewart‘s Chocolate Souffle | Martha Stewart's Baked Alaska with Chocolate Cake and Chocolate Ice Cream | German Chocolate Bombes from Fine Cooking


Proudly designed by Mlekoshi playground